What Centrifuge Accessories Do I Need—And When Should I Replace Them?
Published March 12, 2026Centrifuge accessories don’t get much attention until something goes wrong. But carriers, adapters, inserts, and rotors are the components that actually hold your samples during centrifugation—and worn or mismatched accessories are one of the most common causes of tube breakage, poor separation, and unnecessary vibration. This guide walks through each accessory category so you know what it does, why it matters, and when it’s time for a replacement.
This guidance reflects general best practices for centrifuge accessory maintenance. Always follow your lab’s established SOPs and manufacturer requirements and specifications for your specific equipment and applications.
TLDR:
- Carriers and carrier buckets hold tubes in the rotor and take the most daily abuse—Drucker recommends replacement every 24 months, or immediately if you see signs of cracking or deformation
- Adapters and inserts are weight-matched to the carrier—replace the complete set together, as mismatched or worn components cause wobble, excessive noise, and premature wear on the centrifuge motor and bearings
- Rotors round out the system—follow manufacturer cycle limits even if everything looks fine
Q: What accessories does a centrifuge actually need?
A: Every centrifuge requires a rotor to spin, carriers or buckets to hold tubes inside that rotor, and adapters or inserts to match specific tube sizes to those carriers. The exact combination depends on your centrifuge model, rotor type, and the tube sizes your lab uses most.
Carriers and Buckets
What are they?
Carriers and carrier buckets are the containers that sit inside your centrifuge rotor and hold sample tubes during spinning. They come in several styles depending on the centrifuge platform and application:
- Standard carriers hold tubes in fixed positions sized for common tube lengths (75–125 mm)
- Cappable carriers include a friction fit cap that secures tubes and contains aerosols—important for biosafety and preventing cross-contamination
- Carrier buckets accommodate larger tube sizes (50 mL conical, 140 mL) and are designed for higher-capacity rotors
- High-speed carrier buckets are built from high performance materials rated for higher g-forces
Why do they matter?
Carriers hold the mechanical load of the sample during every centrifugation cycle. They absorb the g-forces generated at thousands of RPM and cushion your tubes. A cracked or warped carrier doesn’t just risk a broken tube—it creates a rotor imbalance that stresses the motor, bearings, and the centrifuge itself.
When should I replace them?
Inspect for these warning signs:
- Visible cracks, chips, or stress marks—especially around the base and rim where forces concentrate
- Warping or deformation that prevents tubes from sitting level
- Discoloration from chemical exposure or repeated autoclaving
- Caps that no longer fit securely or show signs of fatigue
Follow manufacturer recommendations: Even without visible damage, replace carriers at the manufacturer-recommended interval. Drucker recommends replacing tube carriers every 24 months. Material fatigue happens below the surface long before you can see it.
High-volume labs should inspect carriers under heavy use weekly. Lower-volume labs can inspect monthly but keep a usage log so you’re tracking cumulative cycles.
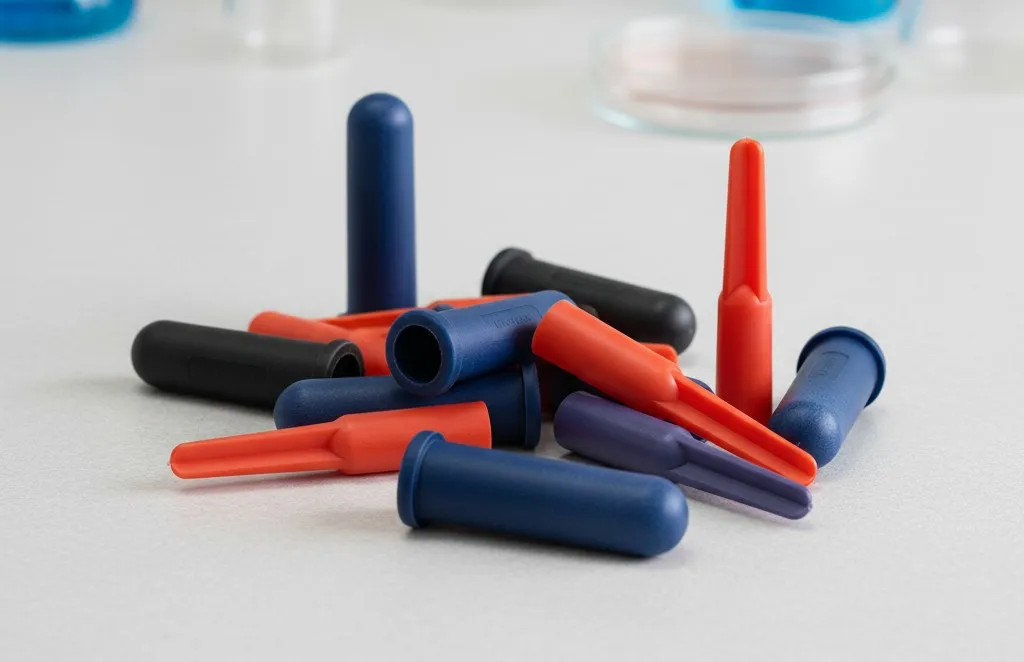
Inserts and Adapters
What are they?
Inserts and adapters fit inside carriers to accommodate tube sizes smaller than the carrier’s native capacity. For example, if your carrier is designed for 16 x 100 mm tubes but you’re running 0.5–2 mL microtubes, a microtube adapter bridges that gap and holds the smaller tube securely during centrifugation.
Common adapter configurations include:
- Microtube adapters for 0.5–2 mL tubes—used frequently in molecular diagnostics and point-of-care testing
- Specialty adapters like microhematocrit kits that enable hematocrit testing on centrifuges not originally designed for capillary tubes
- Cushion inserts are designed specifically for tube types that require additional protection, adding a layer of shock absorption for glass tubes and conical tubes that are more susceptible to breakage under high centrifugal force.
Why do they matter?
Inserts and adapters expand the versatility of your centrifuge. Instead of buying a separate instrument for every tube format your lab encounters, the right set of inserts lets one centrifuge handle multiple tube types, which matters for labs running everything from standard blood draws to specialty microsamples.
A tube that doesn’t fit snugly in its carrier will wobble, shift, or tilt during centrifugation. Even at low RPM, small misalignments create imbalance that can lead to vibration, inconsistent separation layers, and potential tube breakage. Tubes and adapters eliminate that gap and ensure each tube spins at the correct angle and position.
When should I replace them?
Watch for fit degradation: Adapters that no longer hold tubes snugly have lost their dimensional integrity. If tubes rattle or sit loosely, the adapter has worn past its useful life.
Check for material breakdown: Repeated autoclaving, chemical exposure, and UV light all degrade plastic over time. Brittleness, discoloration, or a chalky texture are signs the material is compromised.
Replace immediately if cracked: Even hairline cracks compromise an adapter’s ability to cushion tubes and maintain position. A cracked adapter under high g-force can fragment and damage both the tube and the carrier.
Always replace tubes and adapters as a complete set: Tubes and adapters are weight-matched at the factory to ensure balanced operation. Mixing old and new components creates imbalance that can lead to wobble, excessive noise, and premature wear on the centrifuge motor and bearings.
Rotors
What are they?
The rotor is the central spinning assembly that holds carriers, buckets, or tubes and generates the centrifugal force that separates your samples. Most clinical benchtop centrifuges use one of two rotor types:
- Horizontal (swing-out) rotors allow carriers to swing outward to a 90° angle during operation, producing flat separation layers ideal for blood banking and serology
- Fixed-angle rotors hold tubes at a set angle (typically 25°–45°) throughout the run, which can produce faster pelleting for certain applications
Some centrifuges, like Drucker’s SERO 12 blood banking centrifuge and the TrueBond Duet for veterinary labs, offer removable rotors that can be swapped to change capacity or configuration. For example, switching between a 6-place and 12-place rotor on the same instrument.[Microtube rotors are specialized fixed-angle rotors designed for small-format tubes used in molecular and point-of-care applications.
Why do they matter?
The rotor is the most safety-critical component in any centrifuge. It spins at thousands of RPM and generates forces thousands of times greater than gravity. A compromised rotor isn’t just an equipment issue—it’s a safety hazard. Rotor failure during operation can cause catastrophic damage to the centrifuge and create a serious risk for anyone nearby.
Beyond safety, rotor condition directly affects separation quality. A rotor with corroded carrier pins, worn bearings, or surface damage won’t hold carriers at the correct angle or spin at consistent speeds, which degrades result reproducibility.
When should I replace them?
Follow manufacturer limits strictly: Most rotors are rated for a specific number of cycles or a calendar lifespan. These aren’t suggestions—they’re engineering limits based on material fatigue testing.
Inspect regularly for:
- Corrosion or pitting
- Wobble or play when mounted
- Cracks or stress marks, particularly around carrier attachment points
- Unusual noise or vibration that wasn’t present when the rotor was new
Decommission immediately if you observe any structural damage, regardless of cycle count or age. Never attempt to repair a damaged rotor. Drucker Diagnostics customers can contact our service team for guidance on the return process and quick turnaround to minimize downtime.
Putting It All Together
Centrifuge accessories work as a system. A new rotor paired with worn carriers and cracked inserts will still produce inconsistent results. When evaluating your accessory inventory, think about the complete tube path: rotor → carrier or bucket → adapter or insert → tube.
Quick maintenance checklist:
- Log cumulative cycles per rotor and carrier set
- Inspect carriers and inserts at a frequency matched to your lab volume
- Replace any accessory showing visible damage immediately—don’t wait for the next scheduled inspection
- Keep replacement inventory on hand for your most-used configurations to avoid downtime
- Verify tube-to-accessory compatibility whenever your lab introduces a new tube type or collection system
Matching the right accessories to your tubes and protocols eliminates a common source of pre-analytical variability—and extends the working life of your centrifuge.